Friday, March 27, 2015

Energy and colour

There are a lot of strands of wire in this gizmo for something with such a simple electrical system.  I can imagine that more complex rigs look like a drunken Radio Shack vomited behind the wall-board.  Still, running electrical is fun and fairly satisfying.  Here's the upper raceway before it was all blocked in behind the cabinets:


The AC system is quite simple: a breaker in line with 3 plugs in series, the first being a GFCI, and the second powering a trickle charger for the 12V battery.  The 12V system has a main breaker, a fuse box (below left) and a bus bar (below right).  There are 5 existing circuits and 1 spare, as though I could ever stuff more wires anywhere:
  1. Galley 12V and USB plugs
  2. Cabin 12V and USB plugs
  3. Voltage tester
  4. Vent fan
  5. Lights
  6. ---
Here's the bottom raceway without the cabin cabinets or raceway door.  The 120V breaker box is on the left.  That plug will get mounted in a wall eventually, promise:


Not shown: the path for the primary wire from the raceways up through the galley, over the roof (on a 6" offset to the trailer left side, for future nailing and screwing reference), and out the front floor to the tongue box.  I put the battery in the tongue box to save space in the galley.

Here's the first coat of paint on the interior!  While painting, I realized, somewhat suddenly, that I'm almost done inside the cabin and the galley.  Oh, don't worry, there's a lot to do yet.  This little novel still has a few more chapters:


Just a lovely little space.  See how simple the electrical system looks from the outside?  The little flap opens up in the second tier down for the lower raceway, and a little door inside the cupboard allows fiddling in the upper one, in case I have the urge to go back into the bird's nests:


As of this moment, the interior ceiling has a coat of primer and 2 coat of paint.  I believe I'll find the motivation for coat 3.  The electrical is more or less done, but will need to be tested once everything is installed.  There are some fiddly trim pieces to do, then it's onto the exterior!  I'll dryfit the tongue box first, then start on the roof insulation and skinning.

Friday, March 13, 2015

Raising the roof!

That previous open and airy feeling is being traded for a little more privacy and bug-resistance.  After a minor amount of struggling and cursing, the interior roof skin in place, like so:


All those bracing pieces are temporary, of course.  (Why thank you, Captain Obvious.)  After some back and forth, I did manage to get the whole thing squared up and flush with the spars.  From there, it was easy to remove each spar, apply construction adhesive (bless that thick, gooey nectar) and re-install.  Here's the terminus at the galley:


Oooh, and here are some really, really nice looking base cabinets.  * whistles *  There's another layer on now, but why would I take another picture when I have such an awful one already?  The little knobs I finished a few months ago really add a little rustic charm:


Here's in inside.  Originally, this was going to be finished with a head-liner fabric, but the adhesive I wanted to use soaked right through the fabric backer I ordered on a test swatch.  Yuck.  I wasn't totally sold on a fabric ceiling in the first place.  It would be tough to clean and very hard to repair.  So, to be simple, this will be painted with a nice mildew-resistant paint.  I'm warned that without an absorbent liner, the sound could be a bit "brighter" inside.  Who cares:


The holes for the skylight and vent fan need to be zipped out with the router still, when I get around to it.  Lately, I've been installing the cabinets and electrical components as I go.  The electrical raceways are quite tight, and it's worlds easier to put these things in now rather than once everything's built.

Here's the outside.  That construction adhesive really produces a very strong bond: I did a little test piece with an on-end spar scrap, just like they'll sit on the trailer, and I still can't pry it off with my hands.  It would tear the wood first:


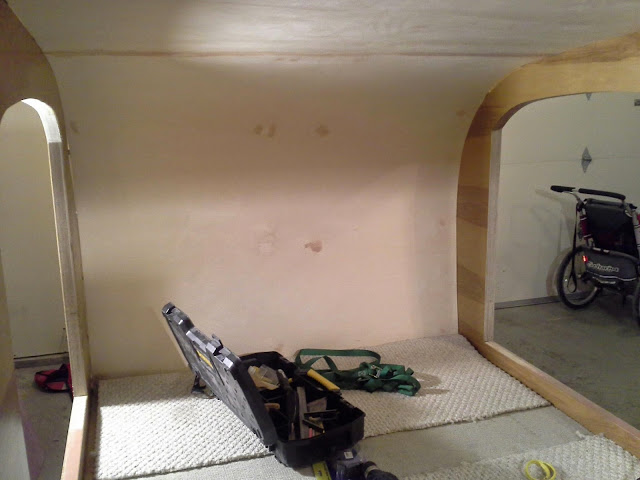
Here's the view from the galley.  I think this will look nice in a cool, calm light blue.  Not baby blue, I'm told, but I'm trusting Terri, who has a better eye for colour than I.  I believe she's beyond picking funny colours as a practical joke, but I can't be totally sure.  Either way, I'm sure it'll be a nice looking place to call home:


I'm busy installing 120V and 12V goodies and cabinets.  Once that's all ticky-boo and I'm relativity certain I won't create any electrical fires, I'll start in on the interior painting and finishing work.

Wednesday, March 4, 2015

Exploded view of cabinets!

Things were all put together in a nice tight unit, for a very short while.  Now pieces of everything are strewn all over the show, like this:


There are more in the trailer and off camera.  It's hard to picture how they're all supposed to fit together, but I know that they do.

They're getting smoother, though!  Tediously and incrementally so.  Sanding this Birch is quite fast compared to harder wood, but the polyurethane raises the grain with the first 2 coats, so it creates a little more sanding than it otherwise would.  Some sheets absorb the finish in kind of an uneven way, which creates tiny little runnels and makes me think, "I should have done the extra step and used a wood conditioner."

Then, right away, I think, "Grow up, Markus.  It's only a camping trailer.  Just have fun with it for crying out loud."

OK, then.  Aren't those lovely?  I should hope so, after so many trips over them:


And we're not done yet!  Some of these have 2 sides!  Well, as Terri cleverly pointed out, they all have 2 sides (6 if you're a geometer), but not all of them will be exposed.

I'm really glad I didn't try all this after the galley was installed.  I thought about it, and there would have been a few advantages, like having a more organized workspace, and being able to sand and finish the major outside corner as a single piece.  But this polyurethane is prone to dripping, and in the back of the footwell and under the sink, it would be hard to do right.  Not to mention, no fun at all.


At the moment, I'm part way through finishing the back side of the members that need it.  And the headliner fabric finally came in the mail!  I've cut the backer and straps for it, so my next few evenings might look a little like this:
  1. Finish the cabinets
  2. Finish the cabinets
  3. Install the bottom cabinets, glue the headliner backer
  4. Laminate face fabric and install headliner
Finishing really does take time and effort.  I'm quite happy with the results thus far, though, and I'm hoping I'm on the way to making a handsome little trailer!

I'm looking forward to installing the electrical, though, because it might be a little less, er, repetitive.