Tuesday, December 29, 2015

Just call me Sandy

Because of the sanding.  Lots and lots of sanding!

So, to clarify, when they say, "get ready for lots of sanding", with projects like this, they mean LOTS of SANDING.  Like, when you're expecting a child and they say you should expect to lose a little bit of sleep.  Or when you're in World War I and they say, "it might be a little muddy."

So I exaggerate a little.  Or do I?

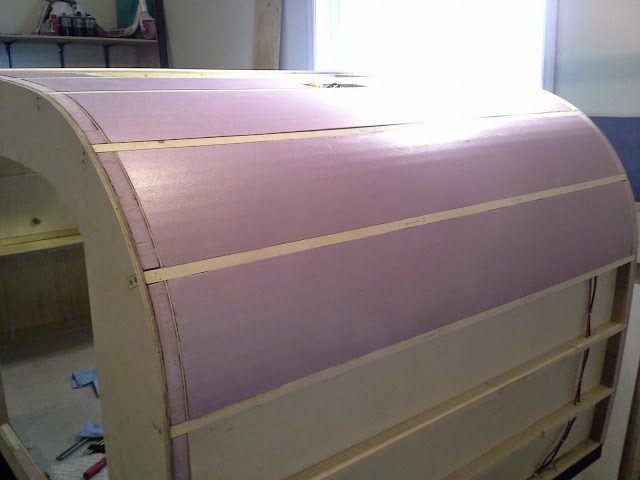
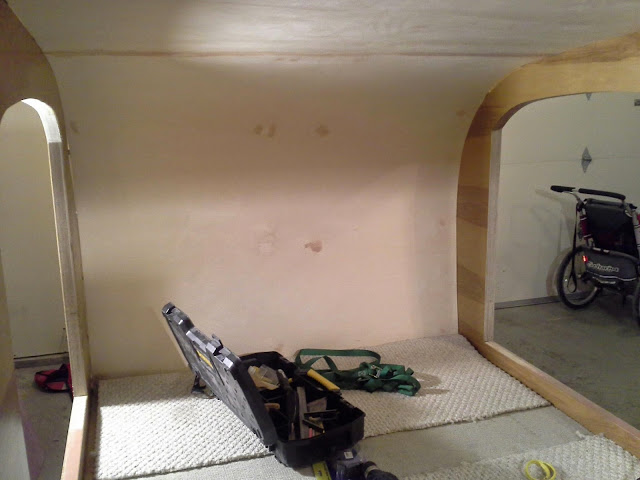
Anywho, not too many photos this time.  Why?  Well, because the damn thing looks precisely like it has for weeks to months, only with varying amounts of plastic-y coating:


I'm getting the hang of epoxy just fine.  It is tricky.  The mixing and quantities are fine (if you can count and stir you can do that), and I haven't seen much amine blush (waxy coating produced during the cure).  However, a couple of other things are non-simple:

  • I got burned by cheap rollers on the first round with the doors.  They lost a lot of fluff in the mix.  That produced a lot of stippling and resulted in excessive sanding.
  • Because this stuff is so transparent, it's easy to think you've just sanded it all off accidentally.  I made that error, again with the outside of the doors.  I washed the dust off (but not well enough), and thought I felt the wood knap underneath.  In retrospect, it was likely the grainy plastic-dust I was feeling.  I've since sanded through the epoxy in other areas, and it's obvious.
  • There are a lot of dips and drips.  It's tough to get it totally even.  My preferred method is to apply with a roller, then "tip" with a soft brush.  I tried applying with a drywall knife, but it wasn't as easy.  Even when applied evenly, it sags a lot, particularly on vertical surfaces.  This makes for more sanding, but the results are still excellent in the end.
  • Speaking of sanding, the old random orbital sander works well for finishing things off, but it's surprisingly slow on the smooth shiny plastic that we start with.  My current solution is to do the bulk of the work with a hand sanding block, which is way faster, and finish with the ROS.  Good results.
  • If you want to wrap the fibreglass around a corner, you need to do it at the same time as the main portion.  I waited with the hatch, and it got crusty and wouldn't bend.  I wound up cutting it off.  Not a big deal -- the joint should be quite strong without, and it'll get aluminium trim eventually anyhow.
So, all that said, here's the summary of progress:
  • The hatch and the doors are mostly done, inside and out.  The hatch got glass on the outside only.  There are a couple of spots to fill, but these are 98% done.
  • The epic glass and sanding job is done on the roof!  The wrap-around on the walls still needs to be sanded, as does the hatch hole, and the fibreglass join area will need a little filling.  As a rough gauge, this took about 4 part-days of sanding!  Part days because I thought my arms might fall off otherwise.  Sanding gets tougher as the surface gets flatter, which makes me think I need a smaller sanding block.
  • The walls and door frames still need to be done.  That should be simple compared to all the glass I've already put behind me.
I'm worried that the epoxy is going to cause some fit issues with the doors and the hatch.  So, like a good boy scout, I plan to take care of this issue before it becomes a problem.  I'm going to fit the aluminium trim right after the epoxy, then test hang everything.  Any fit and potential sealing issues can be solved before paint.  I think I'll just leave the trim in place, and mask it for paint.  Then I can sleep at night and not dream about doors that don't close!

I have a few days off over Christmas.  My hope is to finish the existing sanding and apply the wall epoxy before the break is up.  I could be doing aluminium trim by early in 2016!  Gosh, there's still so much to do ... !

Onwards and upwards!  I mean, time for more sanding.  (I'm less excited than I sound!)

Sunday, November 22, 2015

Painting with warm honey

"Well, that's a strange title."

You know what they say -- any attention is good attention on the Internet.  No wait, that's not quite true.  Hmm.  Anyway, you're here now.

What's the warm honey bit about, then?  Epoxy, as it turns out, is just like painting with warm honey.  Nowhere near as tasty, but a quite similar texture.  It's my first experience with the stuff, and I'm pleased to say it hasn't been wholly unpleasant.  Which is good, because I've heard some stories that have sounded wholly unpleasant.

Here's a quick view of home sweet home garage, way back when I was totally new to using this mysterious substance and not yet an expert (about 10:00am today):


It took longer than you would think to spread that fibreglass cloth out.  I couldn't get 5 foot wide cloth, so I'm joining 2 sheets by kind of spreading together the little fibres at the seam.  Though this apparently becomes quite thin stuff, I have a sneaking feeling it might require some fairing, even after a couple of fill coats.

It is kind of neat stuff though, very strong and silky like a spider-web.  It also makes you itch like fibreglass insulation, which makes complete sense, unfortunately in retrospect.

Here we are again, all prepped and ready:


I was planning on using acetone to clean the wood prior to application, even going as far as buying a bottle of the stuff.  However, when it came right down to it, I didn't.  I used to use acetone in a shoe repair shop I worked at in the industrial revolution, and the stuff is simply nasty.  It eats holes in your mind.  Every decent sniff deletes something important, like how to tie your shoes or who you're married to.  I think that's why I'm colour-blind and I can't swim.  Also, gerkashnitzel.

What instead?  Well, elbow grease.  I started with a brush, then a vacuum, then a shop cloth.  Terri had some micro-fibre cloths, and those worked great on the final lap.  Any remaining dust (not much) will be forever encapsulated in the epoxy, and that's OK.

Cutting to the chase, here's the workshop after the few hours it took to mix and spread all this gunk out:


I'm now at the "hope that worked" stage.  I mixed lots of small batches of the West Systems epoxy (that's epoxy that boat -builders approve of, so, yeah, I'm pretty cool).  I measured carefully with the approved pumps, and I made sure to mix the heck out of it, like I was told to.  It is a little tedious with all that mixing, but not as bad as, say, transferring a 10-pound bag of rice grain-by-grain to another bag and back again.

It's thick stuff compared to paint.  It soaked into the wood doors (no fibreglass going there) quite easily, but it took some patience and persistence (and a lot of epoxy!) to wet out the fibreglass cloth.  It likes to grab dry cloth and pull it all out of alignment, so you need to hold it down and go very slowly.  No problem. I do have, you know, an unlimited amount of time for this.

It's pretty easy to kind of shift it all around as you go, since it's a loose weave.  I don't have any folds or anything dramatic, but I have a suspicion that some of the denser areas might wind up a little ... wavy?  I hope not.  Who knows. I've never done this before.

I mainly used a thin roller, which I'm not totally sold on.  It does OK, but it leaves texture and little fibres every once in awhile.  I may try the next round with a brush (which I will use the acetone for, in an enclosed jar) and see how it goes.

Here's a closer view of the stuck-on cloth:


The ends (left) will get trimmed off, but the sides (right) will get wrapped over and epoxied on once the first coat is cured.  This makes the roof joint all the tougher.  The plan is the same for the roof: I'm told that this fabric should blend into the fibreglass-less walls fairly easily.

Apparently, I'm on a bit of schedule now.  To avoid sanding the thing every time, I apparently need to apply the next coat within about 24 hours.  We'll see.  If it needs a sand anyhow, I might just do that.  Read: if I'm tired after work tomorrow, I'll decide it needs a sand anyway!

Hopefully, I look at this stuff tomorrow and it's nice and hard.  Otherwise, the next blog post might be, "Why I decided to cut the camping trailer into little sticky pieces."

Wednesday, November 11, 2015

Starting to finish

Long time no talk, old friend!  Here's that the old garage workshop looks like these days:


"Hang on a sec," you say.  "That doesn't look any closer to being done.  Those things were attached the last time I saw this."

Well, Watson (we'll assume you're Watson), all these various bits have been disassembled for ease of finishing!

"Finishing?  Why, that must mean ... ?!"

Correct!  This particular trailer is no longer of the "some assembly required" class.  Quite the contrary -- everything (hatch, both doors, door surrounds) have been built.  In fact, this is very little real progress since we last spoke, but we're onto a new phase of the Egg nonetheless.

I'm in the process of fine-tuning the "fairing" (filling and sanding in boat-speak) all the exterior surfaces.  It's going fairly (get it?) quickly, mainly because I did a lot of the heavy lifting in this area when the components were first built.  Also, not to brag, but after 5 cans of this Bondo stuff, I'm somewhat of a lesser genius with it.

Here's the clever braced saw-horse stand I'm using to hold the hatch while we're in progress.  I wish I'd done this when I first built the thing instead of having it rolling around on the floor:


What's next?  After fairing, it's time to crack the seal on the epoxy and start encapsulating the doors, walls, trim, etc, followed by fibreglass on the hatch and roof.  I've never done epoxy before.  I'm a little nervous about what I'll manage to screw up with this hard, permanent, plasticizing material, but life is nothing if not an adventure!

Stay tuned.  The goal is to have this whole assembly on the road for the Spring.  Time is always at a premium, but I'm planning on following a loose mid-week finishing schedule so I can begin to put some smoke behind this camper!

Sunday, September 13, 2015

Not as slow and not as steady

Things have been proceeding a little quicker over the past few weeks, more at the speed of a tortoise than a snail.  I've been working on a couple of fiddly things, and of course general life is still busy and boisterous.

However, there have been a couple of significant recent wins.  First, take a look at this cute young man playing with this perfectly-hung door:


It latches and everything!  Exterior handle not completed, some assembly still required.

There's an inside lip around the whole works where the seal goes, and that was really fussy to install because it has to "gap" just right.  The door strike was also pretty picky and required a couple of tries.  No real engineering feats to share, just a lot of precise and fussy woodworking.  The top part of the rim was a laminated job, so it needed to be clamped, ripped, and cut to size, like this:


The door hinges I ordered originally were fairly inadequate.  They're now archived in a spare parts box for future projects.  The ones I wound up with, though boring and square, do lend kind of a nice solid look to the side of the whole beast.  It's starting to look a bit less, er, European.

I'm told that I should close off the openings on both sides of this Egg, so I suppose I'll have to go through this whole process again.

But wait, there's more!

The gas springs to hold up the hatch had given me a hard time before, largely because I didn't really pay enough attention to the weight requirements or the ball joint design.  The generic models I picked up at Canadian Tire failed in a fairly depressing way.  As with many half-assed decisions, there was a lot of work to undo and redo.

This time around, I offloaded some of the engineering to Gemini Gas Springs in Vernon.  Henk helped me out a lot and delivered a great set of springs, custom made precisely to fit in short order.  The best part of the Gemini springs is that the pressure is adjustable.  By letting out a little bit of gas at a time, I was able to make sure the resulting force "felt" right without doing a slew of calculations.

Here's the result:


They work perfectly.  The hatch holds solidly open, but begins to fall closed on the bottom part of the movement.  If anything, they're a little on the strong side, meaning they'll push the hatch open quite aggressively if a hand isn't on it.  If this turns out to be a problem, it's simple to take a little more gas out later on.

Here's a slightly closer look.  Once everything's finished, it should look quite nice:


I have a few remaining major tasks for the winter.  I think it's reasonable to expect that everything will be finished for Spring, but sometimes "reasonable" means different things to different people:
  1. Install left door sealing surround and latch
  2. Install hatch sealing system
  3. Refinish trailer frame
  4. Full exterior finishing (including epoxy, fibreglass, primer, and topcoat)
  5. Miscellaneous finishing tasks (windows, seals, caulking, fenders, organizers, etc)
The last few hardware additions have this project looking less like a dusty pile of wood and a lot more like, well, a camping trailer!  Imagine that.

Sunday, July 19, 2015

Slow and steady as she goes

By now, we've all likely guessed that this little gizmo won't be quiiiiite ready in time for camping this summer.  In truth, this was part of the plan all along: it was originally considered a 2-winter project.  There was a brief and ambitious period where I thought I'd be able to have something on the road for 2015, but I had a little sit-down with the build committee (I sat down) and came up with this:
  • At the current pace (manic) the project would be tow-able by about late September.
  • Camping season is almost over by then.
  • That wouldn't make sense.
  • Also, work got really busy, and though I still have the same number of hours after Fin's bed-time, I'm more tired now.
So, we're on a little break, the trailer and I.  Oh, no, we still have feelings for one another, it's just that we each need a little ... space.  Actually, as it turns out, a half-built trailer requires quite a lot of space.

We've still spent a few hours together on weekends and evenings and so forth.  Just when I feel like it, not on this accelerated schedule.  I don't really enjoy being busy beyond a certain threshold.  Despite all this, a few small things have been accomplished in the last few months:
  • I got the inner skin on the hatch.  I've also spent a lot of time smoothing out the little buckles and dips on the interior and exterior of the same.  Nearly done, I believe.  I'm going through Bondo like it's Wall Street cocaine.
  • I've got the troublesome and fiddly outer hatch ribs all gapped and ready for what I hope will be a nice outer seal.  I've got a plan for the inner seal, but it might involve a lot of aluminium cutting, which I'm coming to terms with.  It's overcomplicated, which is really the only way I'm comfortable doing things.
  • I started the doors, which is fun and easy compared to the hatch.  I've hung up the frames, built a nice little surround, dry-fit the handles on the doors, and installed the foam core.  Today, I even glued on the inner skin on one of them.
Unfortunately, some of the photos of the door construction didn't make it off a cell-phone that suffered a bit of an incident at work.  Oh well.  On the plus side, the photos from here on should be of a significantly higher quality that those of old.

Here's where those handsome doors are at now:


Lovely, fine work as always.  The little cut-outs will house the handles, and will be routed flush to the inner skin as well.  There will be some type of plate cut to hide the ugly mechanical workings from the fair passengers, but that can wait until closer to the finishing stages.

Here's the inner skin on that hatch.  Look at that beast:


I'm struggling with 2 things to do with the hatch besides sealing:
  • The "holding closed" mechanism.  I feel as though it needs to provide some kind of pressure to compress the seals so the hatch doesn't "flop" and leak on the road.  I might be wrong.  I think that'll need to be evaluated on install.
  • The gas springs to hold the whole guillotine open.  These have been a bit of a pain to find in the right size and tension, though I think I've found a supplier in Vernon.  There was already a failed install with a pair that were the wrong of both variables, but I've learned from the experience.
Here was today's project!  The inner skin is hidden under the template which is used again as a clamp-up stiffener.  You can see a bit of the lip that will overlap a future bumper to form the door seal:


Here's to another summer of tent-camping!  If I was stuck in the garage all the time, we'd have done nothing, but as it is, we've been out for 3 trips already, and another 3 weekends and 2 weeks of holidays on the way.  I've been mountain-biking regularly, which is much better than being in a hot garage all the time.  I'm almost coming to the conclusion that this whole work-life balance makes sense!

Saturday, May 9, 2015

Hatch part II

OK, on with the show!  The first, second, third, and 150th things I did were filling in all these little squares with foam.  Because of the necessary scoring and bending, it would have been easier if the inner skin was in first, but I couldn't think of how to do that with the hatch attached to the trailer ... you know, without literally living inside the galley for two days.  Maybe I lack commitment, but that seemed like too extreme an option:


Tedious, and sticky work.  But, it progresses:


After a week's worth of evenings doing that, I was done!  Hooray.  I'd rather eat a bowl of broken glass than vacuum up any more foam dust.  Time for the main part of the bottom skin: the hatch is a little longer than 5 feet, so we'll need to do a join and a small extra piece.  However, since the hinge will be in the way of all that, we'll need to do that once we take it off.

Here's the glue-up.  This was a tough one, as the hatch had developed a slight middle bow.  This made the edges prone to buckling, and it was a real pain to tack them all down.  Drywall screws helped, but even so, there were a couple of spots that popped up after the screws came out:


Distressing at first, but no major problem.  More glue, and more screws to clamp.  It's a nice looking hatch, once I got my mind away from the microscopic problems.  The small bare spot is just visible at the top:


It even opens!  I'll be honest, it would be quite upsetting if it didn't.  Shown braced with a stick, but the final build will eventually need gas springs to guard against the very real possibility of decapitation:


Off it comes for more work.  The outer skin got finished without event.  The real task moving forward will be making sure the inner skin doesn't distort the hatch too much during gluing.  A skew would prevent it from fitting the hole squarely, and too much spring-back would cause sealing problems:


Here we are, with the requisite gobs of glue cleaned up, all ready for the inside skin:


Once this is built, it will get sanded and filled like the outer roof.  It'll then get reattached, and I'll fiddle with the seal gaps to make sure everything works.  It will stay on while I build the doors, then everything will get finished in pieces.

Summertime camping?  Yes please!  But it's getting warm out already, and I still have work to do!

Tuesday, April 28, 2015

Hatching the egg!

Ooooh, what a clever title for a post.  Ho, ho.  Because I'm writing about building the hatch.  Get it?  Of course you do.

First, here's what I've been up to time-wise: filling in all of those blessed nail holes with Bondo.  Nail holes, you say?  Why, that doesn't sound tricky at all.  Well, it is and it isn't.  Each of the nails produces a localized depression where it compresses the glue, no matter how gentle I was when I put it in.  Evening out the surface wasn't difficult, but it was a little time-consuming.  Bondo is a delight to work with, but it still needs to be mixed and applied in small batches.

On the second roof sheet, I tried using drywall screws and buffering with little squares of MDF.  I think that helped a little, but there was still a fair bit of filling and sanding to do.  The first batch is largely done, and I'll go over it once more to get the leftover dings and any wows that I missed.

However, it's turning out well:


I had some time last weekend, and I decided not to spend it all doing body filling.  I did some tracing, cutting, and sanding, and came up with two templates for the hatch ribs.  There will be 6 in all: the outer ones will fit nicely into that back notch we've been looking at all along, and the internal 4 will hold it all steady at a consistent 1.5" thick.

It was a simple matter to cut them all out with the router, even though my second flush-trim bit is getting a little dull and tired, like its owner.  I put together another spar, notched it out, and attached the ribs at the top end.  Here's the whole assembly just kind of leaned on up there for a photo:


Neat!  But definitely, well, floppy.

After drilling out the hinge, shimming with a bit of 1/8", I attached the top spar at the hinge point.

I've been worrying about sealing the hatch for some time now, and I want to make sure to do it right.  To get a consistent gap and the proper shape (and hopefully to stop it from springing back when the plywood is glued on), I'm going to build as much of the hatch as possible while it's fastened precisely in place.

I measured the gap with a little piece of 1/8" and fastened the side to the main wall with blocks and drywall screws.  This holds the thicker side ribs quite tightly, correctly gapped for the outer seals and flush with the outer wall.  I built a base spar and fastened that onto the ribs using glue and blocking spacers:


Now the ribs are constrained (in 1 direction at least), and it's time to get to work on the short spacer . torsion spars.  With Terri on the table-saw and me doing the installation, this was short work:


Now that looks like a hatch!  A little "transparent" still, but better.

As I said, I'm going to do as much as possible without moving the assembly from the trailer.  I'm part way through the foam installation, and I'll skin it, countersink some nails, and go over it with some Bondo once that's done.  From then on, the shape should be quite firm.  I'll take it off and do the interior skin and further touch-ups while it's loose.

Action item #1 is to take all those tools out of there before they get trapped inside.  Note to self.

That scrap of grey conduit is for the lighting electrical.  It needs a clear path to get shoved through on installation, since the wires can't stay locked in place like on the main trailer.

What a nice curvy little frame.  Onto days and days of fitting in little squares of foam!

Tuesday, April 7, 2015

Insulation and outer roof skin

I spent the last week or so making a huge mess from little pieces of foam bending and gluing building foam into the roof sections, like this one:


Of course, there are wires everywhere, so I needed to cut out the appropriate channels like on the right.  This particular piece was a curvy one, so it needed to be ripped partway through so it would bend, like this:


It all went far better than I thought, honestly.  I expected a lot more breakage and thickness differences than I actually experienced.  Here's a piece all nicely clamped, the LePage PL Premium slowly drying underneath.  I feel like I've finally gotten a handle on how to use this stuff properly:


On the subject of the PL Premium construction adhesive ... I'm using a LOT of it, far more than I naively expected at first blush.  Likely well over 2 dozen 875ml tubes for the whole project.  It makes sense when you mull it over, since the whole structure (walls and ceiling) is foam laminated to wood on both sides.  But that's 50 pounds / $300 of adhesive!  Holy moly.  Something to keep in one's mind when doing a laminated foam project in the future.

But it's great stuff.  I'm happy with it.  It does a better job than nails or screws and it bonds, permanently, to what seems like anything.  It has a thickness, unlike wood glue, and it'll happily fill gaps.

"Why not use contact cement?" I hear future builders crying from their computers.  Well, I'll tell you why:
  • Lots of types of contact cement releases in the heat, like "summer day inside a camper" type of heat.  Not awesome.  The other stuff is harder to find, weaker, and expensive.
  • Contact cement also tends to melt foam.  So that limits us again to an even smaller selection.
  • Contact cement can't deal with thickness.  This was kind of a big deal for this job.  The foam really is hard to get perfectly flush with the wood.  It would have taken ages to sand it out before the second lamination.
  • Especially when laminating thin sheets, it's hard to align them properly at first.  You need some re-position time.  You get about 2 hours with PL, and about 1/5 of a second with contact cement.  I can't think of a good way to perfectly align a huge, floppy, 1/8" sheet of plywood before dropping it into place.
  • You'd need a substantial amount of contact cement too, and it's not free either.
"Why not use epoxy?"  Because it's super-expensive.  The adhesive would cost more than everything else put together.  That stuff is $175 / 3.6L + fillers, which would do just over one side of a 5 x 5 sheet (see below).  Nope, nope, nope.

Here's the math, done unfortunately in retrospect:

For a 5 foot x 5 foot sheet, laminating 1 side with 1mm thick adhesive.  Metric, with apologies to USA, Liberia, and Myanmar.  5 feet = 1.524m.

1.524 x 1.524 x 0.001 = 0.002323 cubic m

Huh.  That doesn't seem like much.

But wait!  1 cubic m is a whopping 100x100x100 cm, or 1,000,000 cubic cm.  Let's move that decimal place over a bit:

0.002323 cubic m = 2323 cubic cm = 2323 ml

At 875ml / tube, that's about 2.7 tubes for a 5 x 5 sheet laminated at 1mm thick.  When I combed the adhesive for the outer skin (below), I used just under 3.  I think that's a little more than I used when I didn't comb it, but some small voids in the walls were acceptable.

Of course, you need to do 2 sides of a roughly 15 x 5 roof and both 10 x 4 walls.  That's about 37 tubes.  But the area is smaller due to curves, cutouts, etc, there's some waste, and I didn't really comb the adhesive for some of the work.  Right now, I dead recon on about 28 tubes, but it could be more.

Enough of that.  The takeaway is: "Plan to use a lot of adhesive to glue really big things."

Here's the top:


And here's the foam all nicely placed.  It all got a bit of a sanding to make it flush before I skinned it, but it wound up fitting quite well:


This is what happens to the foam scraps.  It's really hard to explain to a 3-year-old why it's more important to build my little toy fort than his.  So I just took his down in the middle of the night and hoped he would forget:


Finally, I got part of the external skin on!  I decided to do it 2 parts, which I think was a good idea because it became much less unwieldy at the start and also much easier to "steer".  The walls wound up being pretty square, but there is still a small amount (<1/8") of overlap on one side and a gap on the other.  It would have been more severe if I kept going with the same sheet.

I don't have photos.  I was rushed as it was.

To start, I set up a jig on which to rest the plywood, then combed out the adhesive with a notched trowel to a uniform thickness.  Except for the top end (which does not land on a spar), I used 1-1/4" nails for clamping.  Other than straps, which would not clamp the straight parts as tightly, I couldn't think of another practical way of doing it.

I saw the nails as little adjusters.  I didn't drive them in hard at first.  I tried to adjust them all until the whole piece was following the contours smoothly.  There may be some valleys around the interior nails, but that can be sorted out with Bondo later.  There wound up being quite a large number of nails around the edges, which was necessary to control the bowing.  With plywood this thin, it was more like upholstery than carpentry!

I'm quite pleased with how it looks:


There will be some work to do to make everything smooth.  Once the adhesive is dry, I'll countersink those nails and even everything out with Bondo.  There's a second act as well, from the clamps in the photo to the front of the trailer.  There's a bug in my brain saying that this distance might be longer than 5 feet, so there might be a little fiddle at the front to correct that problem.

I'm now debating adding fibreglass to the 1/8" skins before painting.  The wall I've got seems extremely strong, but the bend will check quite easily (even under epoxy, I'm guessing) and we need to consider flying rocks from the highway.

All things considered, this is progress!  At this rate, I'll be hatch-building in no time.

Friday, March 27, 2015

Energy and colour

There are a lot of strands of wire in this gizmo for something with such a simple electrical system.  I can imagine that more complex rigs look like a drunken Radio Shack vomited behind the wall-board.  Still, running electrical is fun and fairly satisfying.  Here's the upper raceway before it was all blocked in behind the cabinets:


The AC system is quite simple: a breaker in line with 3 plugs in series, the first being a GFCI, and the second powering a trickle charger for the 12V battery.  The 12V system has a main breaker, a fuse box (below left) and a bus bar (below right).  There are 5 existing circuits and 1 spare, as though I could ever stuff more wires anywhere:
  1. Galley 12V and USB plugs
  2. Cabin 12V and USB plugs
  3. Voltage tester
  4. Vent fan
  5. Lights
  6. ---
Here's the bottom raceway without the cabin cabinets or raceway door.  The 120V breaker box is on the left.  That plug will get mounted in a wall eventually, promise:


Not shown: the path for the primary wire from the raceways up through the galley, over the roof (on a 6" offset to the trailer left side, for future nailing and screwing reference), and out the front floor to the tongue box.  I put the battery in the tongue box to save space in the galley.

Here's the first coat of paint on the interior!  While painting, I realized, somewhat suddenly, that I'm almost done inside the cabin and the galley.  Oh, don't worry, there's a lot to do yet.  This little novel still has a few more chapters:


Just a lovely little space.  See how simple the electrical system looks from the outside?  The little flap opens up in the second tier down for the lower raceway, and a little door inside the cupboard allows fiddling in the upper one, in case I have the urge to go back into the bird's nests:


As of this moment, the interior ceiling has a coat of primer and 2 coat of paint.  I believe I'll find the motivation for coat 3.  The electrical is more or less done, but will need to be tested once everything is installed.  There are some fiddly trim pieces to do, then it's onto the exterior!  I'll dryfit the tongue box first, then start on the roof insulation and skinning.

Friday, March 13, 2015

Raising the roof!

That previous open and airy feeling is being traded for a little more privacy and bug-resistance.  After a minor amount of struggling and cursing, the interior roof skin in place, like so:


All those bracing pieces are temporary, of course.  (Why thank you, Captain Obvious.)  After some back and forth, I did manage to get the whole thing squared up and flush with the spars.  From there, it was easy to remove each spar, apply construction adhesive (bless that thick, gooey nectar) and re-install.  Here's the terminus at the galley:


Oooh, and here are some really, really nice looking base cabinets.  * whistles *  There's another layer on now, but why would I take another picture when I have such an awful one already?  The little knobs I finished a few months ago really add a little rustic charm:


Here's in inside.  Originally, this was going to be finished with a head-liner fabric, but the adhesive I wanted to use soaked right through the fabric backer I ordered on a test swatch.  Yuck.  I wasn't totally sold on a fabric ceiling in the first place.  It would be tough to clean and very hard to repair.  So, to be simple, this will be painted with a nice mildew-resistant paint.  I'm warned that without an absorbent liner, the sound could be a bit "brighter" inside.  Who cares:


The holes for the skylight and vent fan need to be zipped out with the router still, when I get around to it.  Lately, I've been installing the cabinets and electrical components as I go.  The electrical raceways are quite tight, and it's worlds easier to put these things in now rather than once everything's built.

Here's the outside.  That construction adhesive really produces a very strong bond: I did a little test piece with an on-end spar scrap, just like they'll sit on the trailer, and I still can't pry it off with my hands.  It would tear the wood first:


Here's the view from the galley.  I think this will look nice in a cool, calm light blue.  Not baby blue, I'm told, but I'm trusting Terri, who has a better eye for colour than I.  I believe she's beyond picking funny colours as a practical joke, but I can't be totally sure.  Either way, I'm sure it'll be a nice looking place to call home:


I'm busy installing 120V and 12V goodies and cabinets.  Once that's all ticky-boo and I'm relativity certain I won't create any electrical fires, I'll start in on the interior painting and finishing work.

Wednesday, March 4, 2015

Exploded view of cabinets!

Things were all put together in a nice tight unit, for a very short while.  Now pieces of everything are strewn all over the show, like this:


There are more in the trailer and off camera.  It's hard to picture how they're all supposed to fit together, but I know that they do.

They're getting smoother, though!  Tediously and incrementally so.  Sanding this Birch is quite fast compared to harder wood, but the polyurethane raises the grain with the first 2 coats, so it creates a little more sanding than it otherwise would.  Some sheets absorb the finish in kind of an uneven way, which creates tiny little runnels and makes me think, "I should have done the extra step and used a wood conditioner."

Then, right away, I think, "Grow up, Markus.  It's only a camping trailer.  Just have fun with it for crying out loud."

OK, then.  Aren't those lovely?  I should hope so, after so many trips over them:


And we're not done yet!  Some of these have 2 sides!  Well, as Terri cleverly pointed out, they all have 2 sides (6 if you're a geometer), but not all of them will be exposed.

I'm really glad I didn't try all this after the galley was installed.  I thought about it, and there would have been a few advantages, like having a more organized workspace, and being able to sand and finish the major outside corner as a single piece.  But this polyurethane is prone to dripping, and in the back of the footwell and under the sink, it would be hard to do right.  Not to mention, no fun at all.


At the moment, I'm part way through finishing the back side of the members that need it.  And the headliner fabric finally came in the mail!  I've cut the backer and straps for it, so my next few evenings might look a little like this:
  1. Finish the cabinets
  2. Finish the cabinets
  3. Install the bottom cabinets, glue the headliner backer
  4. Laminate face fabric and install headliner
Finishing really does take time and effort.  I'm quite happy with the results thus far, though, and I'm hoping I'm on the way to making a handsome little trailer!

I'm looking forward to installing the electrical, though, because it might be a little less, er, repetitive.

Tuesday, February 24, 2015

I like making counter-tops

I spent an evening making what, if I do say so myself, turned out to be a pretty skookum little counter-top.  I've made a couple before, and they're not all that difficult.  However, things could sure go pear-shaped in a hurry if the contact cement were to get out of control!

I started with the base plywood, under-counter brace in place and holes made for the various things sticking through.  We know it fits where it's supposed to because it's been there and back already:


Here it is again, only this time it's coated with sticky (and stinky) contact cement.  The masking tape will prevent the glue from sticking behind the line where the electrical raceway and upper cupboard members connect.  I'll trim it with a laminate cutter and a straight edge:


Firmly stuck on and flush-trimmed:


Now it's time for an end piece.  I'm aware that we're a little on the big side here.  I had a lot of extra material, and I wanted to avoid the funny yet tragic, "accidentally twitched and now the contact cement is stuck in the wrong place" problem.

The overlap near the rear cabinets was trimmed without incident:


And here it is, done!  I flush trimmed the end and ran over it with a 45 degree bit to make a nice little reveal:


The baltic birch makes a nice, layered reveal, which you absolutely can't see in this awful, late-night cell-phone flash photo.  Here instead is a pale strip between two layers of dark stuff.  At least it looks nice and straight:


Trimming the holes for the sink, tap, and propane was just another quick job for the router:


It's the next day, and I still have bits of contact cement on my hands.  I hope that means it'll keep sticking.